CSV On-Prem plugin
The CSV plugin allows you to visualize CSV data, which can either be read from a CSV file or entered manually.
To add a data source click on the + next to Data Sources on the left-hand menu in SquaredUp. Search for the data source and click on it to open the Configure data source page.
You can also add a data source by clicking Add data source on the Settings > Data Sources page, but pre-built dashboards are not added when using this method.
Before you start
The CSV plugin is a "hybrid" plugin, meaning it is available in both cloud and on-prem versions. If you wish to use the cloud version of the plugin which does not require a relay agent to be configured, see CSV plugin.
An on-prem data source connects a service running on your internal network to SquaredUp. It requires an agent installed on a machine that has access to your internal network.
Configuring an agent for a CSV data source
When configuring the data source, there are certain CSV locations you can specify (such as the Windows Folder option) that use Access Control Lists (ACLs) to determine which identities can access the files.
By default, the Relay agent service utilizes your local system identity, meaning you must ensure that your system identity can access your CSV files via an appropriate ACL. For example, if you want to read a CSV from a Windows Folder, you must ensure that the system identity used by the Relay agent is contained in the ACL of your specified Directory location.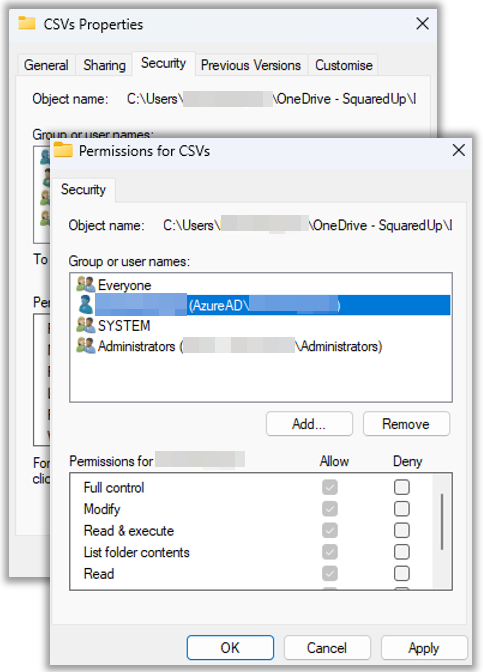
Configuring the data source
Display Name:
Enter a name for your data source. This helps you to identify this data source in the list of your data sources.Agent Group:
Select the Agent Group that contains the agent(s) you want to use.When selecting an agent group, be careful about mixing agent types. If you have a group composed of Linux and Windows agents, there could be potential issues when attempting to read a CSV file from a Windows based location on Linux, and vice versa.
Restrict access to this data source:
You can enable this option if you only want certain users or groups to have access to the data source, or the permission to link it to new workspaces. See data source access control for more information.- Click Update to add the plugin.
Next steps
Once you've added the plugin, you can start using the following data streams to create dashboards to visualize your data.